How to ease keyframes in After Effects, with or without the graph editor
Easy Ease and its three F9 shortcuts, exact speed and influence in Keyframe Velocity, the speed graph, and one curve applied to many keyframes at once.
By Filip Miernik
Tutorial
7 min read
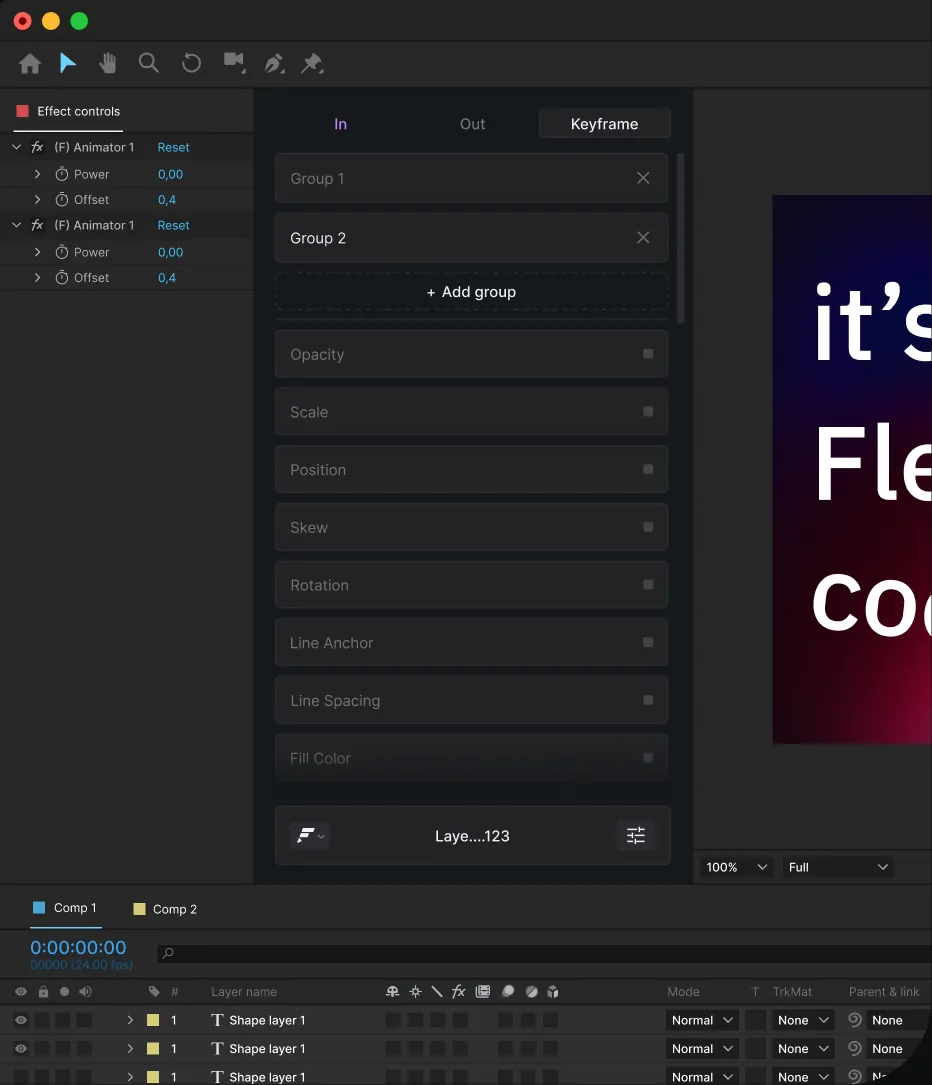
To ease keyframes in After Effects, select them in the timeline and press F9. That applies Easy Ease: each keyframe gets a speed of 0 with an influence of 33.33% on both sides, so the property slows down into the keyframe and speeds up out of it. Press Shift+F9 to ease only the incoming side, or Cmd+Shift+F9 (Ctrl+Shift+F9 on Windows) to ease only the outgoing side.
For any other shape, type speed and influence values in the Keyframe Velocity dialog or drag handles in the Graph Editor’s speed graph. This guide covers Easy Ease, Keyframe Velocity and the speed graph, then shows how Flexile, our After Effects extension, applies one curve to many keyframes without opening the graph editor.
In this guide
- What does easing a keyframe change?
- How to use Easy Ease in After Effects
- How to set exact values with Keyframe Velocity
- Speed graph or value graph: which should you use?
- How to ease many keyframes at once without the graph editor
- What about overshoot and bounce?
- Try Flexile free
What does easing a keyframe change?
Easing sets how fast a property changes as it arrives at a keyframe and as it leaves it. After Effects stores it per keyframe, separately for the incoming and the outgoing side, as two numbers:
- Speed: how fast the value is changing at the keyframe. The units depend on the property. A speed of 0 means the value is at rest at that moment.
- Influence: how far that speed reaches toward the neighboring keyframe, as a percentage. Incoming influence reaches back toward the previous keyframe, outgoing influence forward toward the next one.
Easy Ease is one fixed setting of those numbers: speed 0 and influence 33.33% on both sides. After Effects has five interpolation methods (Linear, Bezier, Continuous Bezier, Auto Bezier and Hold), and Adobe notes that all of them are based on Bezier interpolation.
How to use Easy Ease in After Effects
- Select the keyframes you want to ease in the Timeline panel.
- Press F9, or choose Animation > Keyframe Assistant > Easy Ease.
- Play the comp back and check the motion.
There are three Easy Ease commands, one for each side of the keyframe and one for both:
- Easy Ease (F9) eases both sides of each selected keyframe.
- Easy Ease In (Shift+F9) eases only the side coming into the keyframe. Use it on the keyframe where a move ends.
- Easy Ease Out (Cmd+Shift+F9 on macOS, Ctrl+Shift+F9 on Windows) eases only the side leaving the keyframe. Use it on the keyframe where a move starts.
All three are also under Animation > Keyframe Assistant and as buttons at the bottom of the Graph Editor. Adobe lists every keyframe shortcut in its After Effects keyboard shortcuts reference.
How to set exact values with Keyframe Velocity
Easy Ease always writes the same numbers. To choose them yourself:
- Select the keyframe.
- Choose Animation > Keyframe Velocity, or press Cmd+Shift+K (Ctrl+Shift+K on Windows).
- Under Incoming Velocity and Outgoing Velocity, enter a Speed and an Influence.
- Turn on Continuous (Lock Outgoing and Incoming) if both sides should keep the same velocity.
For a softer start or stop than Easy Ease, keep Speed at 0 and raise Influence above 33.33%. The slow part then reaches further toward the neighboring keyframe. The options and units in the dialog change with the property.
Speed graph or value graph: which should you use?
Both are views of the Graph Editor. Press Shift+F3 to switch the Timeline panel between the Graph Editor and layer bars.
- The value graph shows the property’s value over time: x in red, y in green and z (3D only) in blue. Use it to see exactly where a property is at any point in time.
- The speed graph shows how fast the value changes. A level line means constant speed, and a higher line means faster. Use it for easing, because speed and influence are what its handles control.
Shape an ease in the speed graph
- Select the property’s keyframes and press Shift+F3.
- Open the Choose graph type and options menu and choose Edit Speed Graph.
- Drag a keyframe’s direction handle up to accelerate or down to decelerate. Drag it left or right to change its influence.
- For a gentle start or stop, drag the handle near the bottom and pull the handles away from the center. The graph looks like a smooth U.
- For a sharp peak, set the keyframe to Bezier or Continuous Bezier, drag it up near the top of the speed graph and pull its handles toward the center.
- Alt-drag (Option-drag on macOS) a handle to split or join the incoming and outgoing sides.
Adobe’s guide to speed between keyframes covers each case, and its keyframe interpolation page explains the five interpolation methods.
How to ease many keyframes at once without the graph editor
Flexile, our After Effects extension, lets you draw the ease as one bezier curve on its Animation page and apply it to every move between the keyframes you select, on as many properties as you like. It writes After Effects’ own temporal ease and replaces the ease that was there, so the result is ordinary speed and influence that you can still adjust in the Graph Editor.
The curve shapes each move between two selected keyframes, using the numbers from the sections above. The first handle’s horizontal position becomes the outgoing influence of the keyframe where the move starts, and the second handle’s distance from the right edge becomes the incoming influence of the keyframe where it ends. The vertical positions become speed, worked out from each move’s own value change and duration, so one curve fits a short move and a long one alike. Typing 0.33, 0, 0.67, 1 gives 33% influence and a speed of 0 at both ends of each move, close to Easy Ease. The first selected keyframe keeps its incoming ease and the last one keeps its outgoing ease.
- Select at least 2 keyframes in the timeline, on one property or many.
- Open Window > Extensions > Flexile for AE and go to the Animation page.
- Drag the two handles, type the four values, or click one of the 26 easing presets. The speed graph and the animated ball preview show the timing before you apply it.
- Click Apply. It is one undo step, so Cmd+Z (Ctrl+Z on Windows) takes it back.
It works on one-dimensional values, 2D and 3D spatial properties such as Position, colors and shape paths. With nothing selected, the panel says “No keyframes selected”.
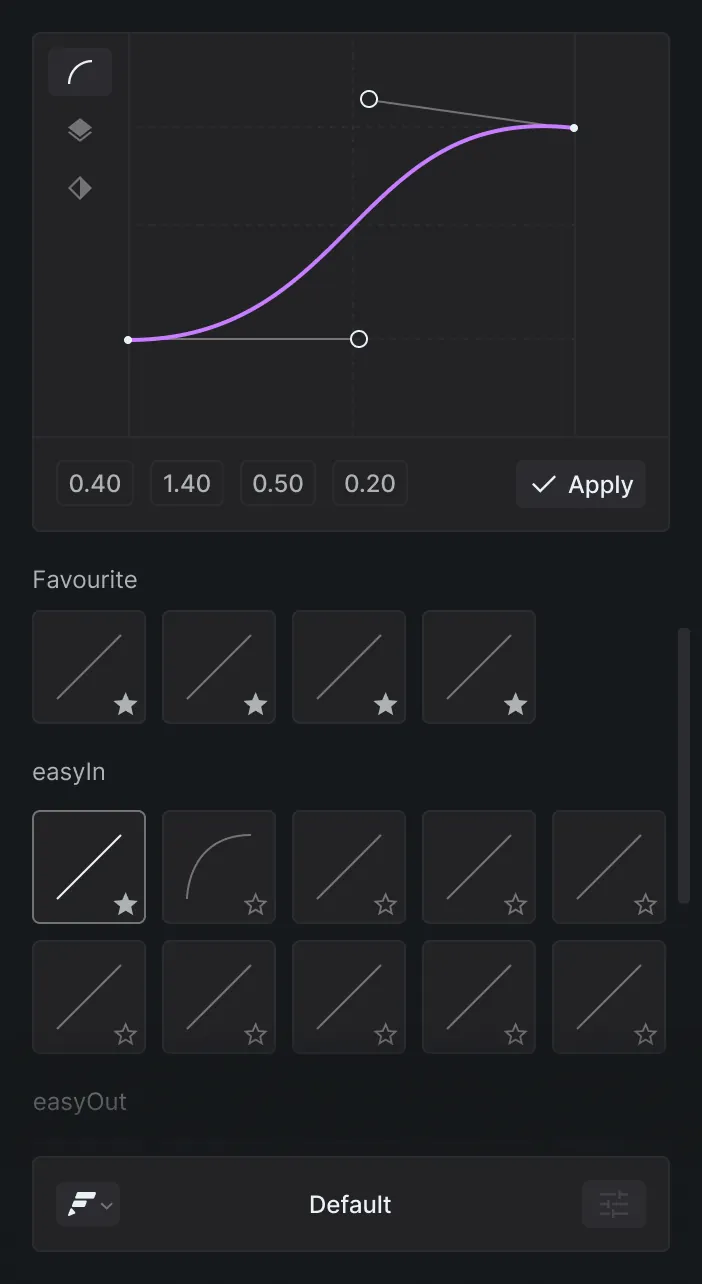
The editor also has Peak and Smart modes for two jobs that Easy Ease can’t do.
Smart mode: one curve across a run of keyframes
Easy Ease sets every selected keyframe to a speed of 0, so a move with eased keyframes in the middle comes to rest at each of them. Smart mode makes the whole run follow one curve instead. Select at least 2 keyframes per property, switch Smart mode on and click Apply.
Flexile splits the keys into groups that move in one direction, keeps each group’s first and last key, and retimes the keys in between. A change of direction starts a new group, and in 2D and 3D that means a turn of 90 degrees or more. The whole change is one undo step. Because Smart mode moves the middle keys in time, use it when their timing is yours to change.
The closest native tool is Rove Across Time, which smooths speed across several keyframes. It works on spatial properties only and never on the first or last keyframe.
Peak mode: a fast hit inside a move
Some moves need a fast hit to feel right. Peak mode finds that moment and adds it for you, and you drag to set how strong it feels.
Select 2 keyframes on each property, where the move starts and where it ends. For each pair, Flexile adds a keyframe between them and eases both halves with split curves, as one undo step. The five presets in the peak group switch Peak mode on when you click them. Peak mode can’t be on while Smart mode is on.
By hand, you need a keyframe at the moment of the hit, dragged up near the top of the speed graph with its handles pulled toward the center, for every move.
What about overshoot and bounce?
In Flexile’s editor, dragging a handle above 1 or below 0 makes the value run past its target or pull back before it starts. Four of the panel’s presets do that, one in each of its four groups (easyInOut, easyIn, easeOut and peak). On Position and other spatial properties, Flexile separates the dimensions first, because a linked spatial property can’t overshoot.
For a wobble that settles after the keyframe, use an overshoot expression instead of an ease. Flexile’s Tools page also has Overshoot and Bounce rigs that add a slider-driven expression to one layer at a time.
Try Flexile free
Flexile runs in After Effects 2025 or newer, the supported version, on macOS and Windows. It is free during beta, with every feature unlocked and no card. You need a free Flexile account to sign in to the panel.
- Bezier mode: at least 2 keyframes. The curve shapes each move between them.
- Smart mode: at least 2 keyframes per property.
- Peak mode: 2 keyframes per property.
Related posts
Bounce and overshoot expressions in After Effects (and one-click versions)
Two commented expressions to paste: an overshoot that springs past each keyframe and a bounce that rebounds like a ball. Plus slider controls, fixes and Flexile’s one-click rigs.
Word-by-word and typewriter text animation in After Effects
Reveal text one word at a time with a Range Selector based on words, turn it into a typewriter with Smoothness at 0%, or let Flexile stagger the words for you.
Best free After Effects plugins (2026)
Plugins that cost nothing on their official pages in September 2026, the free tiers of the big preset libraries, and tools that are often listed as free but are paid.